
The Ultimate Next.js Metadata Guide for 2025
The Next.js Metadata API gives us tools but no map. This is the map: a simple, practical guide to set it up, forget it, and move on. Stop wasting time on metadata and focus on what really matters — building your project.
- Next.js
I’m on a mission to make learning more thoughtful and effective. This is just the beginning, and I’d love for you to join me on this journey. Subscribe to stay updated on new posts. No spam.
Let’s make learning better — together.
Most of us developers hate dealing with SEO.
It’s frustrating, it’s not part of business logic, and it’s definitely not fun.
But it needs to be done.
And we just want to get it done quickly.
Next.js provides us with a flexible Metadata API.
But the docs don’t show what works for most projects.
They also skip some important under-the-hood logic.
So we’re left figuring things out through trial and error.
So we search for guides. But they don’t help.
They explain SEO 101. But we already know that.
They use example.com or SITE_URL. But URLs can be derived automatically.
They tell us to add a ton of icons and a PWA manifest.
But our guts say that’s overkill…
That’s why I wrote this guide.
To help you put everything together.
So you can focus on building what actually matters.
No need for libraries like next-seo or next-sitemap.
Next.js Metadata API is enough for most cases.
And even though this is an “enough-is-enough” setup,
it’s a solid foundation that can be extended when needed.
Metadata
Let me show you a bad example — so we can turn it into a perfect one:
import type { Metadata } from 'next'
import { notFound } from 'next/navigation'

// 1
export async function generateStaticParams() {
  const recentPosts = await fetchRecentPosts()
  return recentPosts.map(({ slug }) => ({ slug }))
}

export async function generateMetadata({
  params,
}: {
  params: Promise<{ slug: string }>
}): Promise<Metadata> {
  const { slug } = await params
	// 2
  const post = await fetchPostMetadataBySlug(slug)

  // 3
  if (!post) {
    return {
      title: 'Post Not Found',
      openGraph: {
        title: 'Post Not Found',
      },
      twitter: {
        title: 'Post Not Found',
      },
    }
  }

  // 4
  return {
    title: post.title,
    description: post.description,
    generator: 'Next.js',
    applicationName: 'Next.js',
    keywords: ['Next.js', 'React', 'JavaScript'],
    authors: [{ name: 'Seb' }, { name: 'Josh', url: 'https://nextjs.org' }],
    creator: 'Jiachi Liu',
    publisher: 'Sebastian Markbåge',
    openGraph: {
      title: post.title,
      description: post.description,
      images: [
        {
          url: post.thumbnailUrl,
          type: 'image/png',
          width: 1200,
          height: 630,
        },
      ],
    },
    twitter: {
      title: post.title,
      description: post.description,
      images: [
        {
          url: post.thumbnailUrl,
          type: 'image/png',
          width: 1200,
          height: 630,
        },
      ],
      card: 'summary_large_image',
    },
  }
}

// 5
export default async function Page({
  params,
}: {
  params: Promise<{ slug: string }>
}) {
  const { slug } = await params

  const post = await fetchPostBySlug(slug)

  if (!post) {
    return notFound()
  }

  return <article>{post.title}</article>
}
Here’s how we might set up metadata for a blog post:
- We
generateStaticParamsso thatrecentPostsare statically optimized. - Then, we use those
paramstofetchPostBySlug. - If the
postisn’t found, wereturnearly. - Otherwise, we return some Basic Fields, along with
openGraphandtwitter. - Finally, we construct the
Pageitself using similar logic.
Now that we have this example, let’s break it down piece by piece.
Duplication
The first thing you’ll notice is duplication here and there.
This is the first confusion you face when working with the Metadata API.
The docs aren’t clear on whether you should duplicate title and description for OpenGraph.
And based on the DRY principle — should we create a helper like constructMetadata?
The truth is — we shouldn’t!
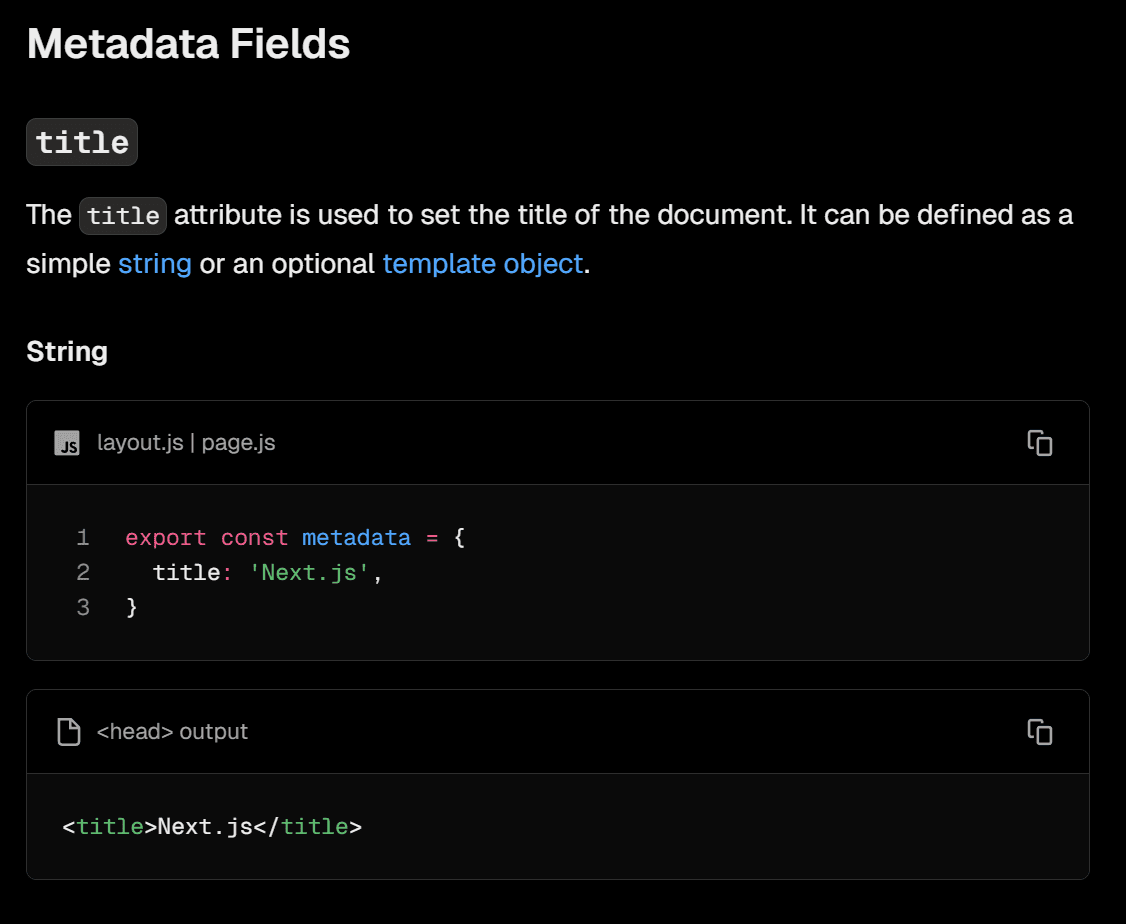
Actually, the correct output is this one:
<title>Next.js</title>
<meta name="description" content="The React Framework for the Web" />

<meta property="og:title" content="Next.js">
<meta property="og:description" content="The React Framework for the Web" />

<meta name="twitter:title" content="Next.js">
<meta property="twitter:description" content="The React Framework for the Web" />
Next.js falls back to the top-level title and description if they’re missing.
Only set openGraph and twitter if you need unique values.
And in most cases, you don’t.
The same applies to images.
You only need to set it for openGraph — twitter will be generated automatically.
So here’s the revised version with no duplication:
export async function generateMetadata({
  params,
}: {
  params: Promise<{ slug: string }>
}): Promise<Metadata> {
  const { slug } = await params

  const post = await fetchPostMetadataBySlug(slug)

  if (!post) {
    return {
      title: 'Post Not Found',
    }
  }

  return {
    title: post.title,
    description: post.description,
    generator: 'Next.js',
    applicationName: 'Next.js',
    keywords: ['Next.js', 'React', 'JavaScript'],
    authors: [{ name: 'Seb' }, { name: 'Josh', url: 'https://nextjs.org' }],
    creator: 'Jiachi Liu',
    publisher: 'Sebastian Markbåge',
    openGraph: {
      images: [
        {
          url: post.thumbnailUrl,
          type: 'image/png',
          width: 1200,
          height: 630,
        },
      ],
    },
  }
}
OpenGraph and Twitter metadata are still generated as expected.
Duplication is one of the biggest misconceptions about the Metadata API.
And most guides out there only reinforce it.
Basic Fields
Next.js docs introduce you to “Basic Fields”.
But do you really need them? And what about “Advanced Fields”?
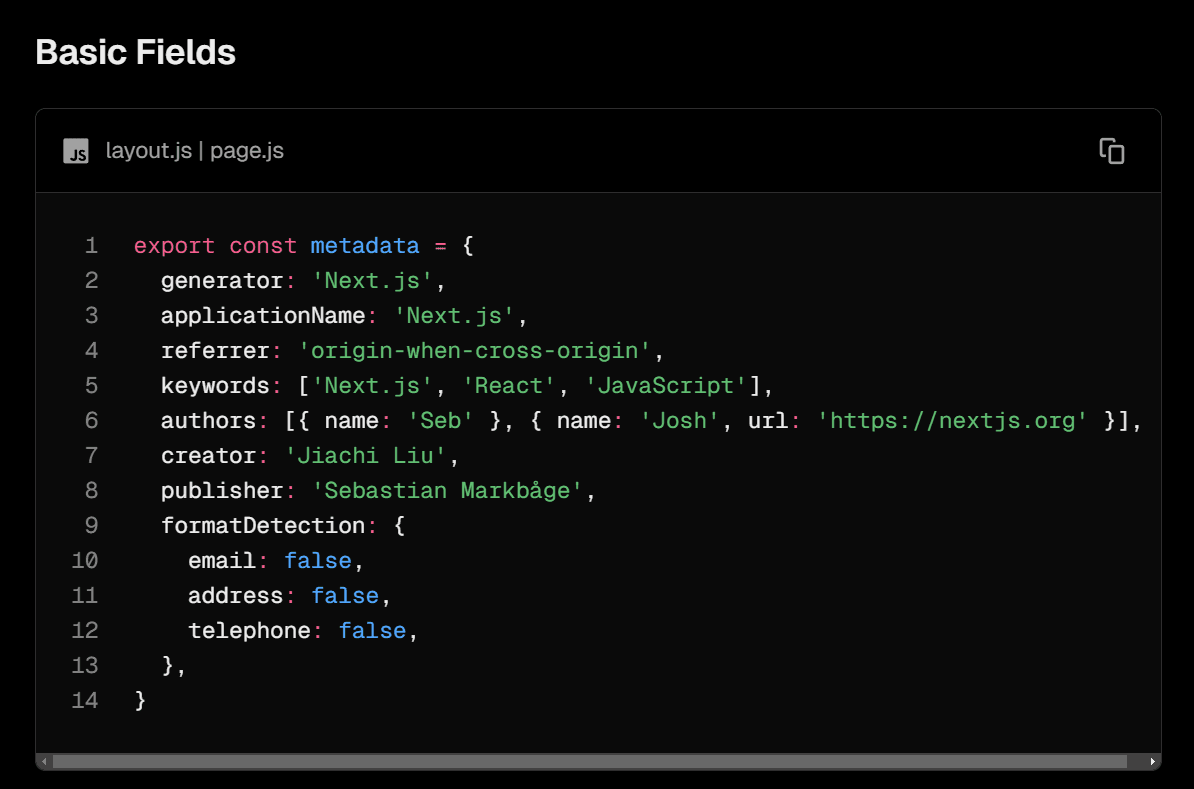
The truth is, search engines don’t care about most of them.
And when you actually need the “advanced” fields, you’ll know for sure.
If you really want to provide these fields, consider JSON-LD:
export default async function Page({ params }) {
  const product = await getProduct((await params).id)

  const jsonLd = {
    '@context': 'https://schema.org',
    '@type': 'Product',
    name: product.name,
    image: product.image,
    description: product.description,
  }

  return (
    <section>
      {/* Add JSON-LD to your page */}
      <script
        type="application/ld+json"
        dangerouslySetInnerHTML={{ __html: JSON.stringify(jsonLd) }}
      />
      {/* ... */}
    </section>
  )
}
It helps search engines generate rich results.
Most projects don’t need it, and if yours does, the official docs explain it well.
So just keep title and description, drop everything else, and let’s move on.
return {
  title: post.title,
  description: post.description,
  openGraph: {
    images: [
      {
        url: post.thumbnailUrl,
        type: 'image/png',
        width: 1200,
        height: 630,
      },
    ],
  },
}
Templates
But what if we don’t want to provide title and description for every page?
How do we set default values?
Now that we’ve removed duplication, templates are useful again!
Often, duplication stops us from using them properly because of how merging works.
Now, we can set proper default in RootLayout — and override them when needed:
export const metadata: Metadata = {
  title: {
    template: '%s • Boaris',
    default: 'Boaris',
  },
  description: 'Some description',
}
Don’t forget — merging is shallow.
And that’s actually a good thing.
You can always merge deeply with structuredClone.
But if merging were deep by default, you couldn’t make it shallow when needed.
Not Found
Now, let’s talk about the Post Not Found state.
Actually, this state isn’t possible in our case:
if (!post) {
  return {
    title: 'Post Not Found',
  }
}
We’re already handling it by calling notFound inside the Page itself.
But we still need to help TypeScript infer the type as non-null — so let’s return it there as well.
if (!post) {
return notFound()
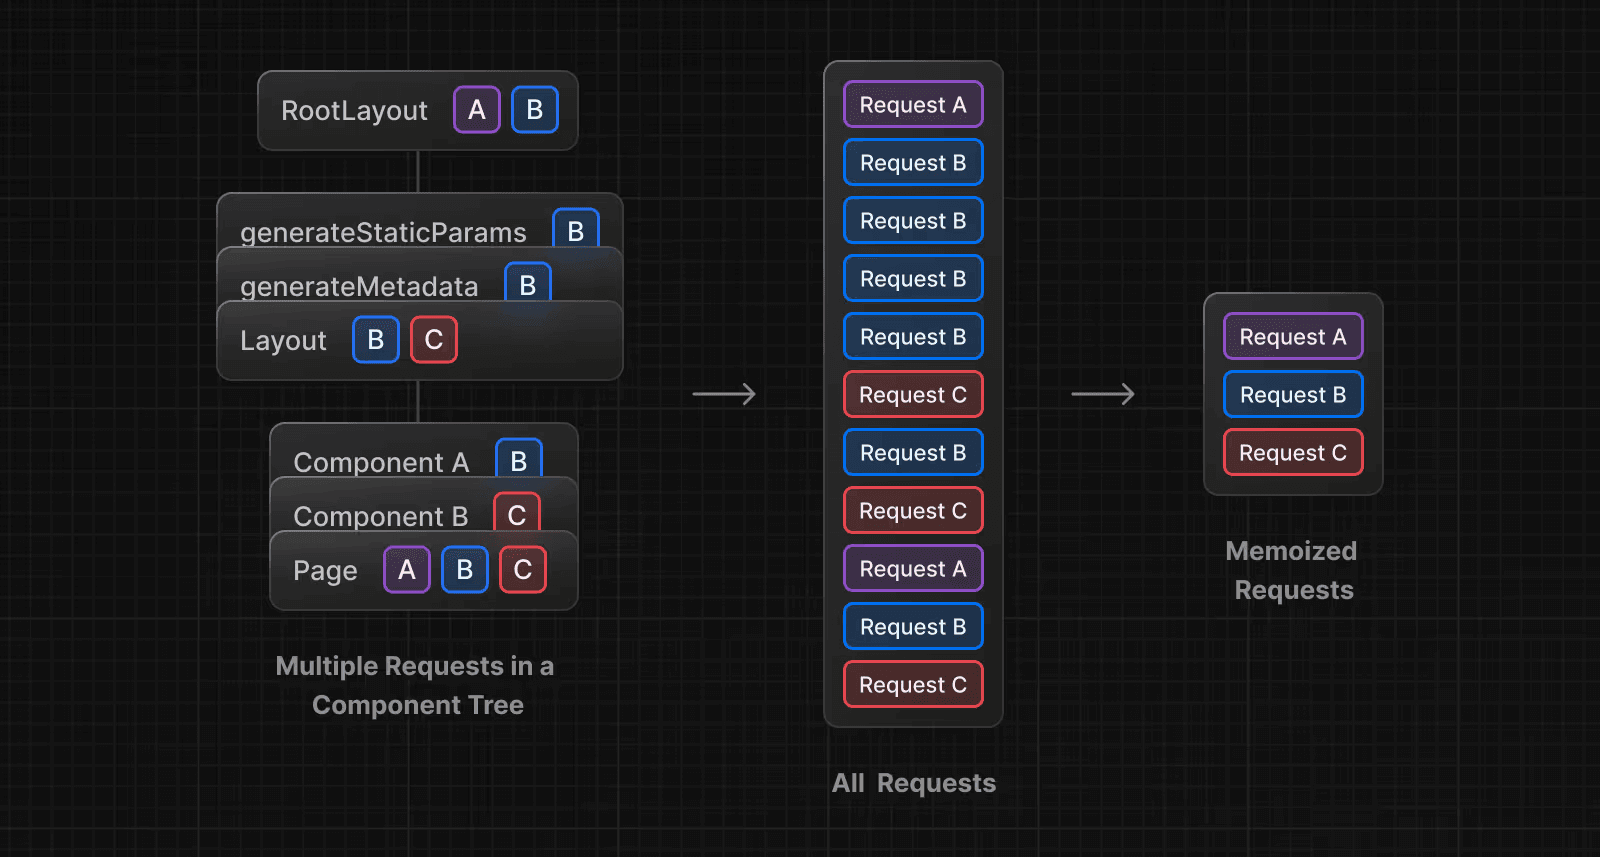
}Request Memoization
You might have noticed that generateMetadata and Page fetch data using different functions.
And that’s a problem.
Next.js memoizes requests with the same URL across functions like generateMetadata and Page.
So you should use a single fetch function for the whole page — even if some fields aren’t needed for metadata.
And now, we’re almost there — except for one thing: images.
It’s much better to generate them.
export async function generateMetadata({
  params,
}: {
  params: Promise<{ slug: string }>
}): Promise<Metadata> {
  const { slug } = await params

  const post = await fetchPostBySlug(slug)

  if (!post) {
    return notFound()
  }

  return {
    title: post.title,
    description: post.description,
  }
}
Not just because this metadata can be precomputed at build time.
But that’s a whole other topic.
Images
The problem with providing a URL in metadata?
Images aren’t cached on the client side.
You need to rely on the origin to serve them properly.
And if they’re inside the public folder, they’re not cached at all:
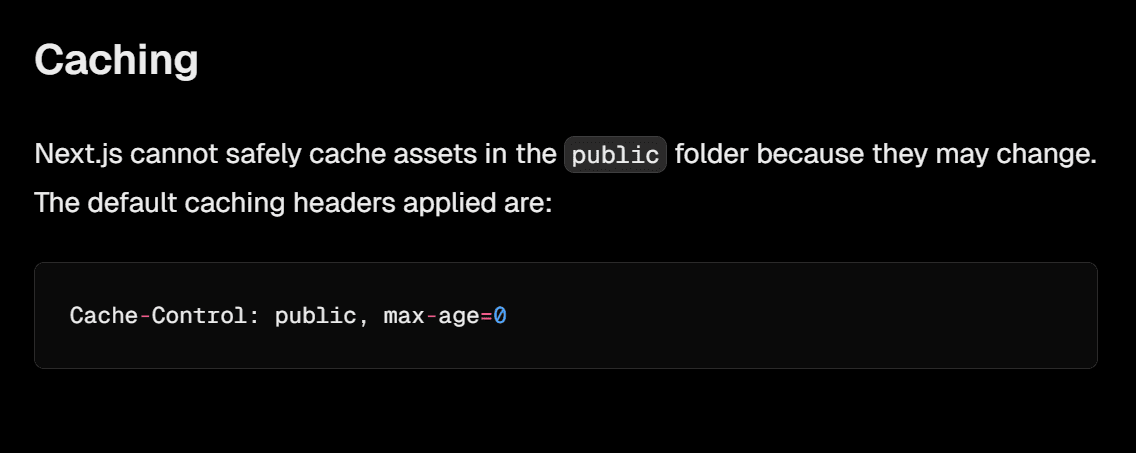
To save bandwidth, images need to be cached properly.
Next.js solves this with Static Rendering:
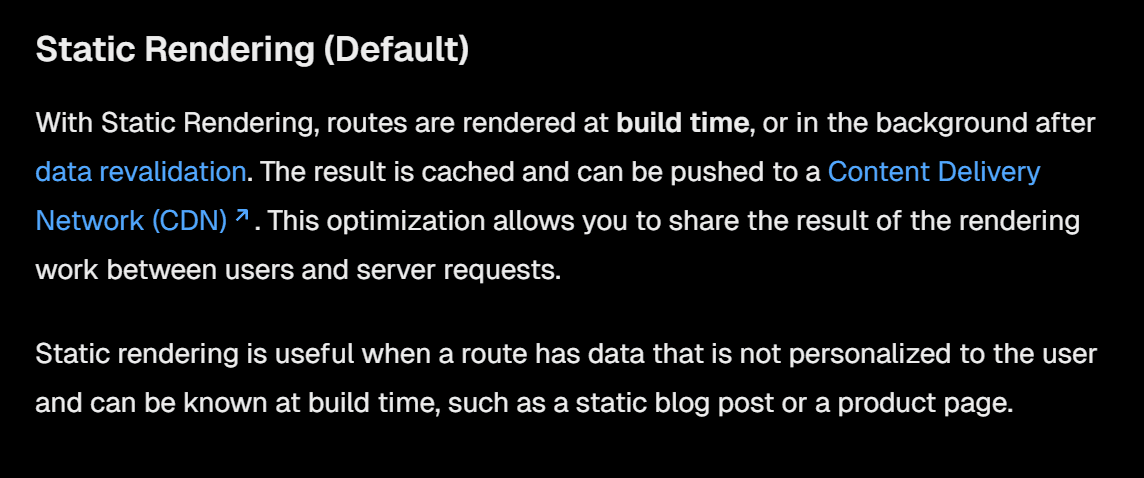
It optimizes images at build time by adding a hash, making them immutable.
It also generates metadata like image type, width, and height for you.
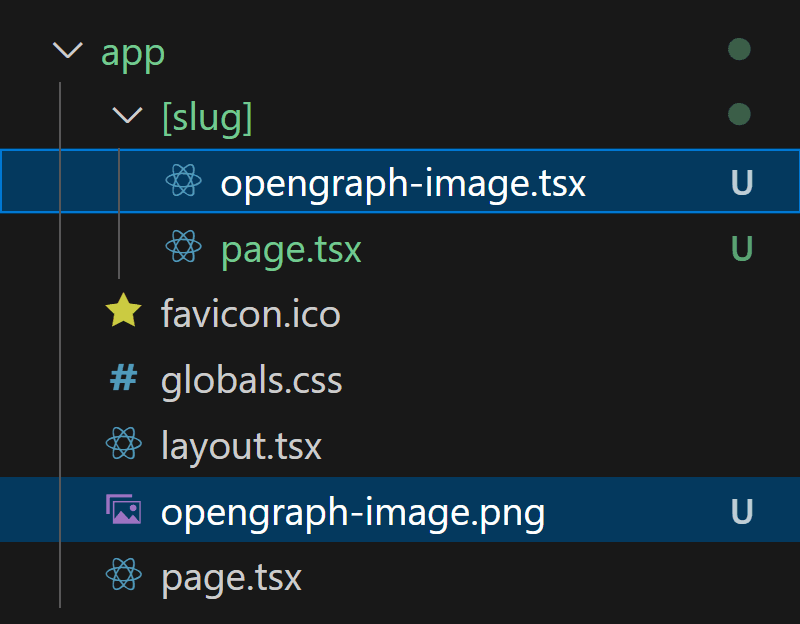
All you have to do is put opengraph-image near page.tsx.
No need for a separate twitter-image.
We can use .png for images we know beforehand — like for the home page.
But dynamic blog post images?
Those should be generated…
Image Generation
Let’s start with a basic example of opengraph-image.tsx:
import { notFound } from 'next/navigation'
import { ImageResponse } from 'next/og'

export const runtime = 'edge'

// 1
export const size = {
  width: 1200,
  height: 630,
}

export const contentType = 'image/png'

export default async function OpenGraphImage({
  params,
}: {
  params: Promise<{ slug: string }>
}) {
  const { slug } = await params
  // 2
  const post = await fetchPostBySlug(slug)
  // 3
  if (!post) {
    return notFound()
  }
  // 4
  return new ImageResponse(
    <div>
      {post.title}
    </div>,
    {
      ...size,
      fonts: [
        {
          name: 'Inter',
          data: await fetch(
            new URL('~/lib/media/fonts/files/Inter-Bold.ttf', import.meta.url),
          ).then((res) => res.arrayBuffer()),
          weight: 700,
          style: 'normal',
        },
      ],
    },
  )
}- Set the recommended size:
1200x630. - Use
paramstofetchPostBySlug, just like before. - Return early if the post is
notFound. - Then, return an
ImageResponse.
Nothing complicated so far. But this isn’t enough.
First, Font Optimization doesn’t work with ImageResponse.
So we have to install fonts locally.
And honestly, I highly recommend doing this anyway.
Take Inter, for example.
The locally installed version has a ton of features that Google Fonts strips out:
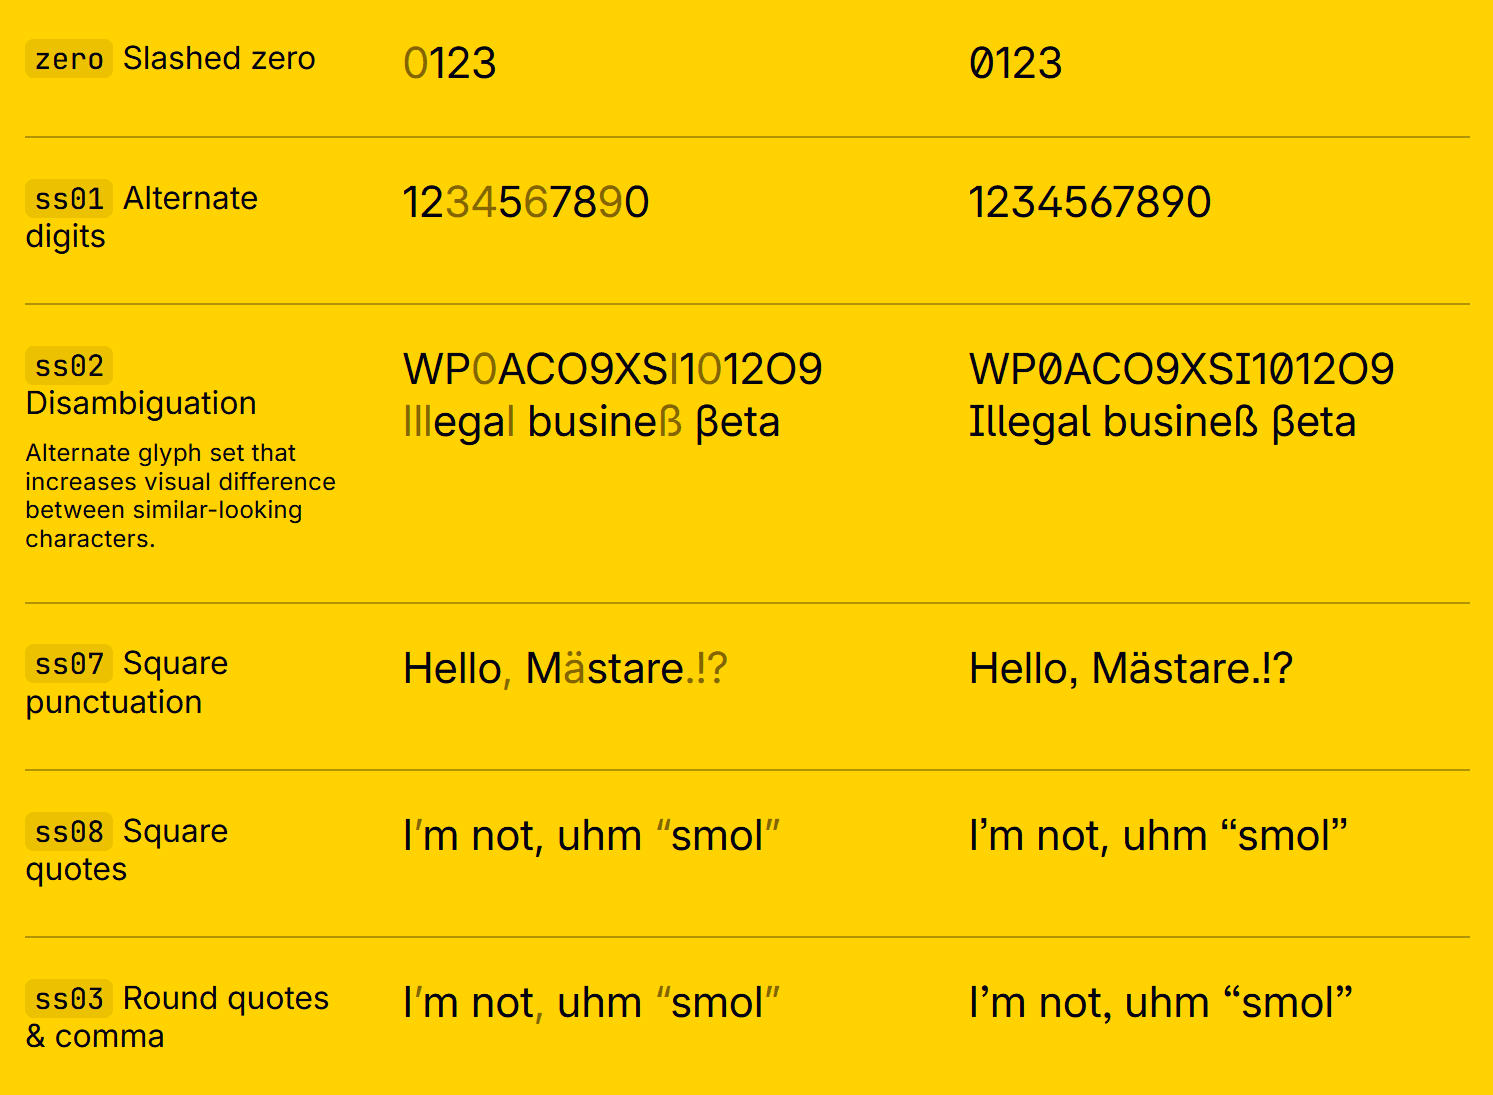
And let’s be real — you’ll have even more options beyond Inter.
It’s everywhere now. 😅
Anyway, download the font, unzip it into your project, and connect it like in the example.
Just note that WOFF2 isn’t supported, so use WOFF or TTF instead.
Also, if you have static text, you can use google-font-to-svg-path as a one-time solution.
When it comes to styling, you have two options: inline styles or Tailwind.
And I don’t recommend the latter.
ImageResponse won’t respect your Tailwind config.
So forget about your carefully set text-primary tokens.
Also, many Tailwind classes aren’t supported, so you’ll end up mixing them with inline styles anyway.
And honestly? There’s nothing wrong with inline styles for this.
They’re simple, and they just work.
To keep things concise, here’s the exact code I use on my website:
import { notFound } from 'next/navigation'
import { ImageResponse } from 'next/og'
import { resolveUrl } from '~/lib/routing/resolvers'
import { postRepository } from '~/model/data/post'

export const runtime = 'edge'

export const size = {
  width: 1200,
  height: 630,
}

export const contentType = 'image/png'

export default async function PostImage({
  params,
}: { params: Promise<{ slug: string }> }) {
  const { slug } = await params

  const post = postRepository.find((it) => it.slug === slug)

  if (!post) {
    return notFound()
  }

  return new ImageResponse(
    <div
      style={{
        position: 'relative',
        display: 'flex',
        flexFlow: 'column',
        justifyContent: 'center',
        alignItems: 'center',
        fontFamily: 'Inter',
        width: '100%',
        height: '100%',
        background: '#000',
        color: '#fff',
        textShadow: '0 2px 6px #000',
      }}
    >
      <img
        src={resolveUrl(post.thumbnailUrl)}
        alt="N/A"
        style={{
          position: 'absolute',
          width: '100%',
          height: '100%',
          opacity: 0.8,
          filter: 'blur(20px)',
        }}
      />
      <h1
        style={{
          fontSize: '3.75rem',
          lineHeight: '3.75rem',
          maxWidth: '48rem',
          letterSpacing: '-0.025em',
          textAlign: 'center',
          fontWeight: 'bold',
          color: 'transparent',
          backgroundClip: 'text',
          backgroundImage: 'linear-gradient(to bottom, #fff, #adb5b2)',
          boxShadow: '0 4px 10px #eee',
        }}
      >
        {post.title}
      </h1>
      <div
        style={{
          display: 'flex',
          alignItems: 'center',
          fontSize: '3rem',
          lineHeight: '3rem',
          fontWeight: '700',
        }}
      >
        <span style={{ opacity: 0.8 }}>Boaris</span>
      </div>
    </div>,
    {
      ...size,
      fonts: [
        {
          name: 'Inter',
          data: await fetch(
            new URL('~/lib/media/fonts/files/Inter-Bold.ttf', import.meta.url),
          ).then((res) => res.arrayBuffer()),
          weight: 700,
          style: 'normal',
        },
      ],
    },
  )
}
Feel free to take inspiration, and let's move on.
Icons
Besides images, you’ll need a favicon and a few larger icons for bookmarks.
The first question is: how many?
You’ve probably seen guides telling you to crop 20-30 images, convert them into multiple formats, and add a ton of meta tags:
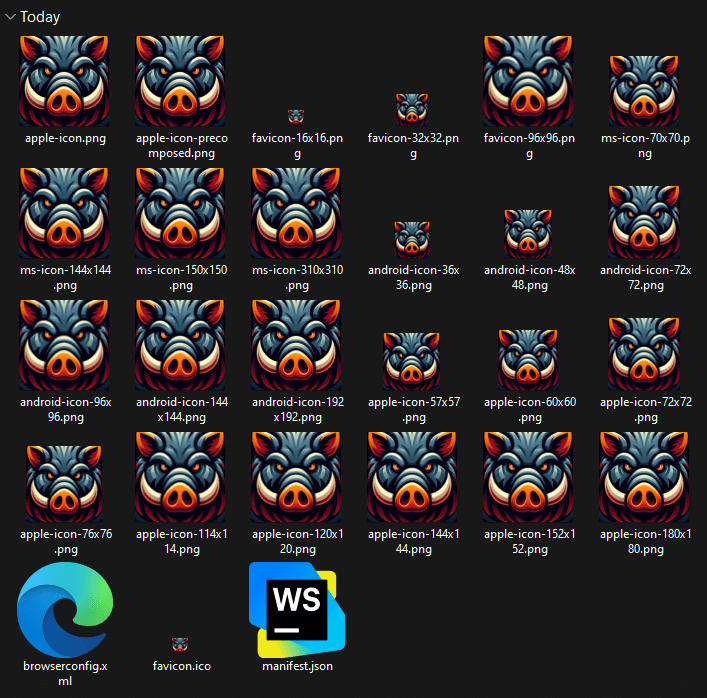
Don’t worry — that’s outdated advice.
Unless you care about rare edge cases, keep it simple.
What about PWA manifests?
Let’s be honest — how many users even know about that, let alone use it?
Unless you’re building a full-fledged PWA, it’s just not worth the effort.
For most use cases, here’s all you need:
- Prepare a large
180x180icon. Use this as your base. - Visit RealFaviconGenerator.
- Upload your icon.
- Download the generated files.
From the downloaded favicon-for-app.zip:
- Extract
apple-icon.png,favicon.ico, andicon.pnginto yourappfolder. - Skip
icon.svg. It’s just a base64 version of your PNG and can be 10x larger. Use it only if you have a true vector version of your icon.
For most projects, this setup is enough.
Adding 20-30 icons is like supporting IE11 — you should know exactly why you’re doing it.
Sitemap
The Next.js Sitemap API is straightforward.
You fetch your data and use basic JavaScript loops to generate the sitemap:
export default async function sitemap(): Promise<MetadataRoute.Sitemap> {
  const posts = await fetchAllPostSlugsWithDates()

  return [
    {
      url: 'https://example.com',
    },
    {
      url: 'https://example.com/about',
    },
    {
      url: 'https://example.com/blog',
    },
    ...posts.map(({ slug, updatedAt }) => ({
      url: `https://example.com/blog/${slug}`,
      lastModified: updatedAt,
    })),
  ]
}
But there’s one catch.
You can’t use relative URLs like you can in metadata .
Next.js doesn’t provide any API for resolving relative URLs in sitemaps.
Fortunately, we can simulate this behavior by looking at the default logic for resolving URLs in metadata:
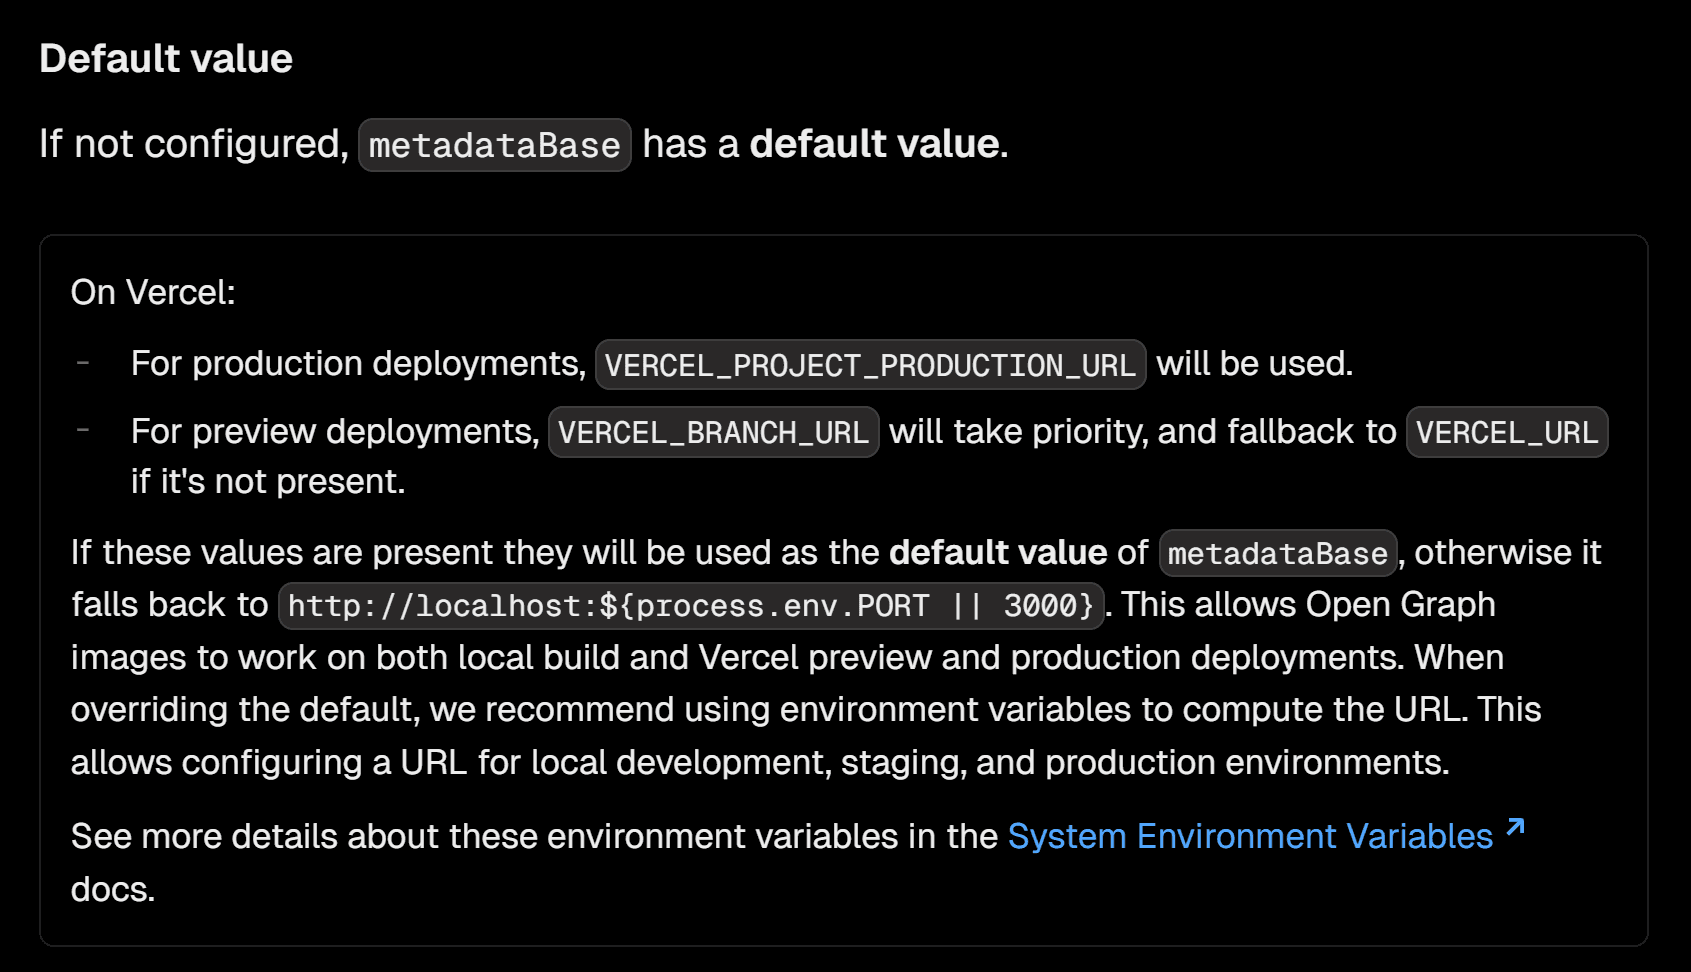
After some digging, I found functions in the source code that can be combined into a utility for resolving both relative and absolute URLs.
It’s not identical to how metadata handles URLs, but it’s close enough:
import {
  getSocialImageMetadataBaseFallback,
  resolveAbsoluteUrlWithPathname,
} from 'next/dist/lib/metadata/resolvers/resolve-url'

export const resolveUrl = (url = '/') =>
  resolveAbsoluteUrlWithPathname(
    url,
    getSocialImageMetadataBaseFallback(null),
    {
      trailingSlash: false,
      pathname: '/',
      isStaticMetadataRouteFile: false,
    },
  )
So here’s the sitemap with the integrated utility function:
import { resolveUrl } from '~/lib/metadata/resolvers'

export default async function sitemap(): Promise<MetadataRoute.Sitemap> {
  const posts = await fetchAllPostSlugsWithDates()

  return [
    {
      url: resolveUrl('/'),
    },
    {
      url: resolveUrl('/about'),
    },
    {
      url: resolveUrl('/blog'),
    },
    ...posts.map(({ slug, updatedAt }) => ({
      url: resolveUrl(`/blog/${slug}`),
      lastModified: updatedAt,
    })),
  ]
}
This utility isn’t just useful for sitemaps.
It’s also useful for things like resolving the basePath for Auth.js endpoints.
Thank me later!
A Note on Ignored Fields
In the example above, we included lastModified to help crawlers detect post freshness.
But we skipped fields like priority and changeFrequency because Google ignores them.
Here’s why:
- They’re often misconfigured. For example,
priorityis a relative field, but many sites incorrectly set it to1, making it meaningless. - They’re prone to abuse — just like
keywordsin metadata. EvenlastModifiedonly matters if it’s "consistently and verifiably accurate".
Do I Need a Sitemap Index?
Another question: do you need a sitemap index?
Google limits sitemaps to 50,000 URLs each.
A sitemap index lets you split large sites into multiple sitemaps.
Unless you’re expecting over 50,000 URLs, this is overkill.
It’s a complex feature and often a premature optimization, much like JSON-LD for metadata.
If you do need it, here’s how:
- Use a library like next-sitemap, which provides straightforward instructions for generating a sitemap index.
- Write custom code. Next.js has an API for generating multiple sitemaps, but you’ll need to generate the index file manually. (There’s a pull request to automate this, but it’s still a work in progress.)
Robots
This is the easiest section of the guide. We will:
- Allow everything.
- Disallow
/api/*paths. - Use the
resolveUrlutility to define the sitemap URL.
import type { MetadataRoute } from 'next'
import { resolveUrl } from '~/lib/metadata/resolvers'

export default function robots(): MetadataRoute.Robots {
  return {
    rules: [
      {
        userAgent: '*',
        // 1
        allow: ['/'],
        // 2
        disallow: ['/api/*'],
      },
    ],
    // 3
    sitemap: resolveUrl('sitemap.xml'),
  }
}
And that’s it.
No tricks, no complications.
Wrapping Up
That's it! Now you have a solid foundation for most projects.
Hopefully, I’ve dispelled some myths about things that don’t matter anymore.
Most of them are just edge cases.
Sure, you might need JSON-LD or better Twitter Cards at some point.
But that’s easy to figure out.
And it will fit right into this setup.
SEO might not be fun, but it doesn’t have to be a headache.
I’m on a mission to make learning more thoughtful and effective. This is just the beginning, and I’d love for you to join me on this journey. Subscribe to stay updated on new posts. No spam.
Let’s make learning better — together.